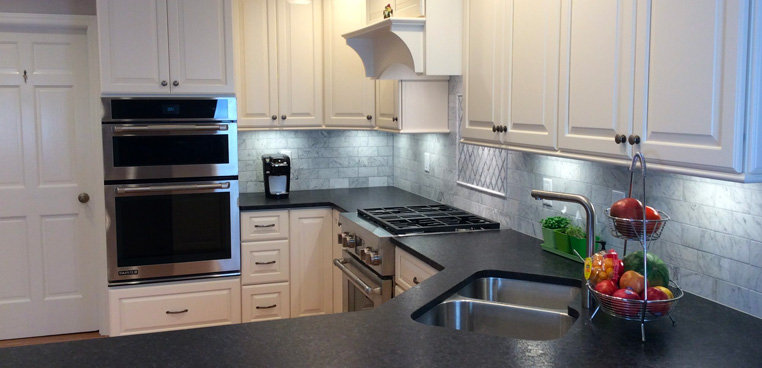
Managing Your Kitchen or Bath Remodeling Project
 Taking on a kitchen or bath remodeling project can feel like an overwhelming undertaking. Careful planning and management provides the structure needed to keep the remodel on track, on budget, and headache-free. This comprehensive guide covers techniques for effectively managing your kitchen or bath remodel to achieve the ideal finished space efficiently.
Set Clear Goals and Requirements Upfront
Defining goals and must-haves from the outset provides focus:
- List your top priorities and wishlist features so nothing gets overlooked.
- Determine if this is a cosmetic refresh or full structural renovation. Scope impacts timelines and costs.
- Define your ideal aesthetic – traditional, contemporary, minimalist, etc.
- Decide which elements need upgrading like cabinetry, sinks, lighting.
- Determine rough budget and if financing is needed.
- Consider how long you can manage with space out of commission.
- Account for any special needs like accessibility or aging in place modifications.
Your contractor can then design and quote accordingly. Vague initial direction gets projects off track.
Assemble Your Remodeling Team Thoughtfully
Your team influences the experience and outcome:
- Start with an experienced general contractor or firm that specializes in bath/kitchen projects similar to yours. Check credentials.
- Only subcontractor teams with proven expertise led by the contractor. Ask to review portfolios.
- If hiring an architect or designer, ensure the contractor integrates them early into planning.
- Verify required licenses, bonding, and insurance.
- Confirm contractor availability to dedicatedly manage during your entire project timeline.
A cohesive, qualified team minimizes snags and delivers exceptional work.
Create Detailed Cost Breakdowns
Comprehensive quotes provide cost clarity:
- Get at least 3-4 quotes to compare. Beware very high or very low bids.
- Look for detailed breakdowns – materials, labor, demolition, permits, fees, contingency buffer.
- Ask about potential change order and overage policies should costs increase.
- Clarify payment expectations – deposit amounts, progress installment schedule, hold backs.
- Understand what warranties the contractor provides on workmanship.
Itemized estimates prevent budget surprises and outline payment terms clearly upfront.
Secure Permits and Approvals
Navigating permitting streamlines work:
- Determine which permits are needed – plumbing, electrical, structural.
- Ask contractor’s scope of responsibility on permit process – filing, coordinating inspections, managing approvals.
- For complex projects, having contractor handle permitting from start to finish is best. Discuss timeline impacts.
- Build buffer into schedule for permit approval lag time. Quick approvals still often take 2-4 weeks.
- Verify if architectural plans must be submitted and if local design board reviews are required.
- Reconfirm details like scope and property address listed match project specifics accurately.
Securing proper permits prevents work delays plus proves compliance if issues later arise.
Map Detailed Timelines and Milestones
Realistic scheduling minimizes disruption:
- Have contractor provide a detailed project schedule with expected start/end dates for each phase – demolition, construction, inspections, finishes.
- Build contingencies into the schedule upfront for potential delays like shipment lags, permit approvals, inspector availability.
- Know earliest start date so you can confirm availability and flexibility.
- Understand how weather could impact ability to work or affect timelines.
- Ensure reasonable timeframes are allocated for final punch list completion and sign off.
Careful planning makes orchestrating seamless temporary living arrangements easier.
Plan Temporary Kitchen and Bath Workarounds
Organize interim provisions for daily needs:
Kitchen
- Will existing kitchen remain partially functional? Clarify appliances still accessible.
- Consider bringing in temporary cooking appliances if kitchen will be fully offline. Refrigerator, microwave, electric burner often helpful for basics.
- Stock up on paper plates, cups, utensils to minimize dishwashing needs.
- Arrange meal delivery services or pickup healthy prepared foods nearby.
Bath
- Confirm if existing baths will stay operational during remodel.
- For only bath disruption, plan to use gym, office or public shower facilities nearby.
- Rent temporary luxury bathroom trailers until your new bathroom finished.
- Stagger work on multiple bathrooms to maintain one fully operational if possible.
Being prepared eases frustrations of functioning without these critical rooms short term.
Pack and Protect Belongings from Remodeling Hazards
Proper prep protects existing items from damage:
- Document condition of all fixtures and finishes thoroughly beforehand should issues arise.
- Photograph item placements to simplify proper resetting after project ends.
- Empty cabinets and drawers contents completely prior to work starting.
- For kitchens, empty and turn off refrigerators and freezers if being removed or relocated.
- Label contents of boxes as you pack so items get returned to proper places.
- Relocate small valuables like jewelry securely to prevent misplacing.
- Cover and seal items remaining in work zones thoroughly. Use lockable storage.
- Turn off power and water supply to appliances being removed or relocated.
Avoid assuming belongings will be unimpacted without taking proper precautions.
Select Finishes and Materials Mindfully
Make material choices that balance aesthetic, durability, and cost considerations:
- Research the pros and cons thoroughly for options like cabinets, counters, tile, lighting.
- Request physical samples of finishes you are considering to view true tone, texture.
- Ask about lead times for shipment and potential supply lags. Order well in advance.
- Understand your lifestyle and how choices withstand real world wear and tear long term.
- Weigh quality vs cost. Get quotes for different tier options to make informed tradeoffs.
- Don’t let trends dictate all choices. Opt for some timeless classics.
Material that looks gorgeous but fails prematurely under use won’t make you happy long term.
Communicate Clearly with Your Contractor
Set expectations for regular, transparent discussion:
- Establish preferred communication methods and frequency early on – email, calls, messaging apps, in-person meetings.
- Provide detailed documentation in writing of all product selections and any change orders.
- Request regular photo updates on progress to stay involved when not on site.
- Have contractor walk through updates at key milestones in the schedule.
- Ask questions proactively. Remaining silent about concerns can worsen issues.
- Be understanding of reasonable delays but follow-up if timeline changes aren’t communicated promptly.
Open lines of contact allow addressing any concerns immediately before escalating.
Prepare for Inspections Diligently
Inspections ensure project adherence to codes and approved plans:
- Know sequence of inspections needed – plumbing, electrical, framing, final, etc. Have contractor clarify responsibility for coordinating each.
- Accommodate inspection timing in overall project schedule so work does not get delayed waiting for inspectors.
- Verify inspection results meet code compliance and expected approvals. Request contractor provide official inspection reports.
- If issues arise, require contractor to explain how they will remedy concerns noted formally by inspectors.
- Be present during final inspection walkthrough to understand any remaining punch list items you must sign-off on before final payment.
Passing mandated inspections protects safety while preventing costly change orders later to bring things up to code.
Maintain Proper Insurance and Warranties
Protect your investment once the remodel is complete:
- Obtain any extended product or workmanship warranties from contractor and keep in accessible records.
- Review homeowners insurance policy to adjust coverage amounts and add riders given property improvements.
- Ask about maintenance plans contractors offer on finishes like seals and caulking. Upkeep preserves results.
- For DIY elements, review manufacturer warranties in case issues surface. Keep receipts and model details.
- Continue regular home maintenance routines like sink drain clearing, caulking, and grout sealing.
Proper documentation ensures you can easily remedy problems if anything arises with warrantied work later on.
Execute the Project Completion Phase Methodically
Follow protocols to close out the project smoothly:
- Do a walkthrough inspection ensuring finished work matches plans and change orders. Note any deficiencies.
- Create a punch list of minor lingering tasks, repairs or corrections needed for contractor sign-off.
- Withhold final payment until all punch list items are completed to satisfaction.
- Review lien waivers from general contractor and subcontractors showing they were paid as expected.
- Ensure all permits were properly closed out with local building departments.
- Request any warranties, owner’s manuals, leftover materials, and final invoice.
- Give your contractor a positive review and referrals if the process went smoothly from start to finish.
Proper project closeout protects your investment and provides recourse if issues later arise.
By investing time upfront defining goals, assembling an experienced kitchen and bath remodeling team, plotting detailed schedules, selecting durable finishes, communicating expectations clearly, and following through on final inspections and paperwork, kitchen and bath renovation progress from initial concepts to finished masterpieces smoothly. Homeowners who take an organized project management approach can sit back and enjoy the final remodeled results for years to come.
